
Route2Pass Exam Prep
Master Irish Road Signs.Then Test Yourself in 60 Seconds.
Learn signs by category, build confidence for your practical test, and take a quick route-focused quiz to check if you are exam ready.
401 Total Signs13 Categories15-Question Quick Quiz
Regulatory signs
77 signs
Keep Right

Pass Either Side

Keep Straight Ahead

Turn Right

Turn Left

Turn Left Ahead

Turn Right Ahead

Pedal Cycles Only

Clearway

No Straight Ahead

No Right Turn

No Left Turn

No Overtaking
.png&w=1080&q=75)
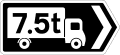
Maximum Gross Weight (Traffic Management)

Height Restriction

No U-Turn

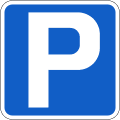
Parking Permitted

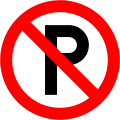
No Parking

Taxi Stand

Electric Vehicle Parking Permitted

Pedestrianised Street
.png&w=1080&q=75)
Géill Slí (Yield sign in Irish)

Yield

Yield Sign for Cyclists

Stop

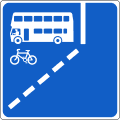
Nearside With-flow Bus Lane

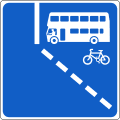
Offside With-flow Bus Lane

Contra-Flow Bus Lane

Bus Stop

School Warden

School Street

LRT Speed Limit

LRT Stop

LRT Yield

Nearside Tram Lane

Offside Tram Lane

No Pedestrians
.png&w=1080&q=75)
Speed Limit (120 km_h)
.png&w=1080&q=75)
Speed Limit (100 km_h)
.png&w=1080&q=75)
Speed Limit (80 km_h)
.png&w=1080&q=75)
Speed Limit (60 km_h)

Rural Speed Limit
.png&w=1080&q=75)
Speed Limit (50 km_h)
.png&w=1080&q=75)
Speed Limit (30 km_h)

Prohibited Number of Axles

Prohibited Axles in Right Hand Lane

Mini Roundabout

No Entry

Maximum Vehicle Length

Maximum Vehicle Width

Maximum Gross Weight

Maximum Axle Weight

No Cycles

No Ridden or Accompanied Horses

No Horse and Carts
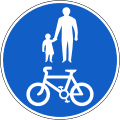
Shared Route for Pedal Cycles and Pedestrians
.png&w=1080&q=75)
Segregated Route for Pedal Cycles and Pedestrians (Cycle on Left)
.png&w=1080&q=75)
Segregated Route for Pedal Cycles and Pedestrians (Cycle on Right)

Contra-flow Cycle Track

Contra-flow Cycling on One Way Street

Contra-flow Cycling on One Way Street
.png&w=1080&q=75)
Stop (Manual Control)
.png&w=1080&q=75)
Go (Manual Control)
.png&w=1080&q=75)
Téigh (Manual Control)

No Vehicles Carrying Explosives
Restriction on Parking – Specified Events

Speed Limit (40 km_h
.png&w=1080&q=75)
Speed Limit (20 km_h)

Pedestrian Crossing

Parallel_Combined Zebra Crossing

Cycle Street

End of Cycle Street

Shared ZoneRUS 070 Shared Zone

End of Shared Zone

Town Name and Speed Limit Sign

Warning Traffic Calming Sign
Want to practice these signs on Naas test routes?
These signs commonly appear around Naas examiner routes.
Warning signs
126 signs
Crossroads

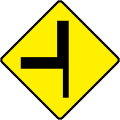
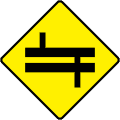
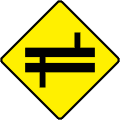
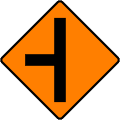
Side Road - Left

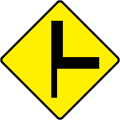
Side Road - Right
%2520-%2520Left.png&w=1080&q=75)
T-Junction (Type 1) - Left
%2520-%2520Right.png&w=1080&q=75)
T-Junction (Type 1) - Right
%2520-%2520Left.png&w=1080&q=75)
T-Junction (Type 2) - Left
%2520-%2520Right.png&w=1080&q=75)
T-Junction (Type 2) - Right

Y-Junction - Left

Y-Junction- Right

Crossroads at Sharp Corner - Left

Crossroads at Sharp Corner - Right

Staggered Junctions - Left_Right

Staggered Junctions - Right_Left

Two Junctions on Left

Two Junctions on Right

Side Road on Outside of Bend - Left

Side Road on Outside of Bend - Right

Side Road on Inside of Bend - Left

Side Road on Inside of Bend - Right

Crossroads on Bend - Left

Crossroads on Bend - Right
.png&w=1080&q=75)
Side Road on Dual C'way - Left (with CR Break)
.png&w=1080&q=75)
Side Road on Dual C'way - Right (with CR Break)
.png&w=1080&q=75)
Side Road on Dual C'way - (No CR Break)

Crossroads on Dual C'way
%2520Ahead.png&w=1080&q=75)
Crossroads (Major Road) Ahead
%2520Ahead.png&w=1080&q=75)
T Junction (Major Road) Ahead

Staggered Crossroads Ahead - Left

Staggered Crossroads Ahead - Right
Junction With Major Road at Sharp Corner - Left
Junction With Major Road at Sharp Corner - Right

Crossroads Ahead at Dual C'way
.png&w=1080&q=75)
T Junction Ahead at Dual C'way (With CR Break)
Staggered Crossroads Ahead at Dual C'way - Left
Staggered Crossroads Ahead at Dual C'way - Right
.png&w=1080&q=75)
T Junction Ahead at Dual C'way (No CR Break)

Merging Traffic From Left

Merging with Traffic on Right

Merging and Diverging Traffic

Loop

Compact Junction

Stop Ahead

Yield Ahead

Traffic Signals

Roundabout Ahead

Mini Roundabout Ahead

Sharp Corner - Left

Sharp Corner - Right

Sharp Bend - Left

Sharp Bend - Right

Series of Sharp Corners - Left

Series of Sharp Corners - Righ

Series of Sharp Bends - Left

Series of Sharp Bends - Right

Single Chevron - Left

Single Chevron - Right
%2520-%2520Left.png&w=1080&q=75)
Multiple Chevrons (Two) - Left
%2520-%2520Right.png&w=1080&q=75)
Multiple Chevrons (Two) - Right
%2520-%2520Left.png&w=1080&q=75)
Multiple Chevrons (Three) - Left
%2520-%2520Right.png&w=1080&q=75)
Multiple Chevrons (Three) - Right

Road Narrows on Left

Road Narrows on Right

Road Narrows on Both Sides

Two-way Traffic

Two-way Traffic Crossing
.png&w=1080&q=75)
Three Lanes of Traffic (Two With, One Against)
.png&w=1080&q=75)
Three Lanes of Traffic (One With, Two Against)
%2520-%2520Left.png&w=1080&q=75)
Lane Loss (Two to One Lane) - Left
%2520-%2520Right.png&w=1080&q=75)
Lane Loss (Two to One Lane) - Right
%2520-%2520Left.png&w=1080&q=75)
Lane Loss (Three to Two Lanes) - Left
%2520-%2520Right%2520(with%2520200m%2520panel).png&w=1080&q=75)
Lane Loss (Three to Two Lanes) - Right (with 200m panel)
%2520-%2520Left%2520(with%2520400m%2520panel).png&w=1080&q=75)
Lane Loss (Four to Three Lanes) - Left (with 400m panel)
%2520-%2520Right.png&w=1080&q=75)
Lane Loss (Four to Three Lanes) - Right

Road Divides

Dual Carriageway Ends

Start of Passing Lane

One-Lane Section

Two-Lane Section

Start of Climbing Lane

Steep Descent

Steep Ascent

Restricted Headroom

Overhead Electrical Cables

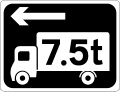
Maximum Vehicle Length

Maximum Vehicle Width
.png&w=1080&q=75)
Maximum Gross Weight (Traffic Management)

Maximum Gross Weight

Maximum Axle Weight

Prohibited Number of Axles

Level Crossing With Flashing Red Signals

Level Crossing With No Flashing Red Signals
.png&w=1080&q=75)
1L Level Crossing Countdown Marker (100 m)
.png&w=1080&q=75)
2L Level Crossing Countdown Marker (200 m)
.png&w=1080&q=75)
3L Level Crossing Countdown Marker (300 m)

Risk of Grounding

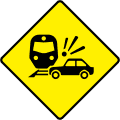
Tram Crossing

Tram Advisory Speed
Level Crossing with No Flashing Red Signal – User Operated

Road Hump

Road Depression

Humpback Bridge

Uneven Road

Slippery Road

Soft Verge

Pedestrians

Pedestrians Crossing

School Ahead

Children Crossing

Cyclists

Slippery for Cyclists

Cyclists Dismount

Pedestrian_Cycle Crossing

Accompanied Horses

Cattle or Farm Animals

Sheep

Deer or Wild Animals

Jaunting Cars

Unprotected Water

Ford

Tunnel

Queues Likely
.png&w=1080&q=75)
Drive on Left (Repeater)

Other Hazard

Barrier Board - 3 Bars

Barrier Board - 4 Bars

Barrier Board - 5 Bars
Want to practice these signs on Tallaght test routes?
These signs commonly appear around Tallaght examiner routes.
Traffic signals
23 signs
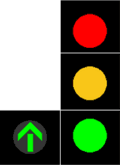
2 aspect pedestrian signal

3 aspect pedestrian signal

3 aspect standard traffic signal

3 aspect bus traffic signal

3 aspect go straight traffic signal

3 aspect left turn traffic signal

3 aspect right turn traffic signal

3 aspect U-turn traffic signal

Green go straight 3 aspect traffic signal

Green left turn 3 aspect traffic signal

Green right turn 3 aspect traffic signal

4 aspect traffic signal with green bus
4 aspect traffic signal with green go straight

4 aspect traffic signal with green left turn
.png&w=1080&q=75)
3 aspect flashing amber left turn traffic signal (alternative)
.png&w=1080&q=75)
3 aspect flashing amber left turn traffic signal (preferred)
.png&w=1080&q=75)
3 aspect flashing amber right turn traffic signal (alternative)
.png&w=1080&q=75)
3 aspect flashing amber right turn traffic signal (preferred)

Railway crossing signal

2 aspect cycle signal

3 aspect cycle signal
5 aspect traffic signal with bus and arrow

Flashing amber signal
Want to practice these signs on Raheny test routes?
These signs commonly appear around Raheny examiner routes.
Toll Road Signs
2 signs
Toll Road Ahead

Toll Plaza Ahead
Want to practice these signs on Finglas test routes?
These signs commonly appear around Finglas examiner routes.
Roadwork signs
88 signs
Roadworks Ahead
.png&w=1080&q=75)
One-lane Crossover (Out)
.png&w=1080&q=75)
One-lane Crossover (Back)
.png&w=1080&q=75)
Move to Left (One Lane)
.png&w=1080&q=75)
Move to Right (One Lane)
.png&w=1080&q=75)
Move to Left (Two Lanes)
.png&w=1080&q=75)
Move to Left (Three Lanes)
.png&w=1080&q=75)
Move to Right (Two Lanes)
.png&w=1080&q=75)
Move to Right (Three Lanes)

Obstruction Between Lanes

End of Obstruction Between Lanes

Start of Central Reserve or Obstruction

End of Central Reserve or Obstruction

Lanes Diverge at Crossover

Lanes Rejoin at Crossover
.png&w=1080&q=75)
Two-lane Crossover (Out)
.png&w=1080&q=75)
Two-lane Crossover (Back)

Merge to the Right
.png&w=1080&q=75)
Single Lane (for Shuttle Working)

Two-way Traffic

Road Narrows on Left

Road Narrows on Right

Road Narrows on Both Sides

Merging Traffic from Left
.png&w=1080&q=75)
Lane 2 of 2 Closed (Level 3)
.png&w=1080&q=75)
Lane 2 of 2 Closed (Level 1)
.png&w=1080&q=75)
Lane 1 of 2 Closed (Level 3)
.png&w=1080&q=75)
Lane 1 of 2 Closed (Level 1)
.png&w=1080&q=75)
Lane 3 of 3 Closed (Level 3)
.png&w=1080&q=75)
Lane 3 of 3 Closed (Level 1)
.png&w=1080&q=75)
Lane 1 of 3 Closed (Level 3)
.png&w=1080&q=75)
Lane 1 of 3 Closed (Level 1)
.png&w=1080&q=75)
Lanes 2 & 3 of 3 Closed (Level 3)
.png&w=1080&q=75)
Lanes 2 & 3 of 3 Closed (Level 1)
.png&w=1080&q=75)
Lanes 1 & 2 of 3 Closed (Level 3)
.png&w=1080&q=75)
Lanes 1 & 2 of 3 Closed (Level 1)
.png&w=1080&q=75)
Lane 4 of 4 Closed (Level 3)
.png&w=1080&q=75)
Lane 1 of 4 Closed (Level 3)
.png&w=1080&q=75)
Lanes 3 & 4 of 4 Closed (Level 3)
.png&w=1080&q=75)
Lanes 1 & 2 of 4 Closed (Level 3)
Side Road on LeftWK 050 Side Road on Left

Side Road on Right

Site Access

Temporary Traffic Signals

Flagman Ahead

Queues Likely

Hump or Ramp

Uneven Surface

Slippery Road

Loose Chippings

Soft Verge

Pedestrians Cross to Left

Pedestrians Cross to Right

Temporary Pedestrian Crossing

Cyclists Keep Left

Cyclists Keep Right

Cyclists

Slippery for Cyclists

Detour
.png&w=1080&q=75)
Diverted Traffic (Left)
.png&w=1080&q=75)
Diverted Traffic (Right)
.png&w=1080&q=75)
Diverted Traffic (Straight)
.png&w=1080&q=75)
Diverted Traffic (Upper Left)
.png&w=1080&q=75)
Diverted Traffic (Upper Right)

End of Detour

Detour Destination

Road Closed

Stop Here On Red

Free Recovery

Free Recovery End

Convoy System in Operation

Follow Me
.png&w=1080&q=75)
Lane 2 of 2 Narrow (advance)
.png&w=1080&q=75)
Lane 3 of 3 Narrow (advance)
.png&w=1080&q=75)
Lanes 2 & 3 of 3 Narrow (advance)

Lane 2 of 2 Narrow

Lane 3 of 3 Narrow

Lanes 2 & 3 of 3 Narrow

Lane 2 of 2 Closed MLC

Lane 1 of 2 Closed MLC

Lane 3 of 3 Closed MLC

Lane 1 of 3 Closed MLC

Lanes 1 & 2 of 3 Closed MLC

Lanes 2 & 3 of 3 Closed MLC

Lane 4 of 4 Closed MLC

Lane 1 of 4 Closed MLC

Lanes 1 & 2 of 4 Closed MLC

Lanes 3 & 4 of 4 Closed MLC
Want to practice these signs on Dundrum test routes?
These signs commonly appear around Dundrum examiner routes.
information signs
20 signs.png&w=1080&q=75)
County Boundary Sign (Type A)
.png&w=1080&q=75)
County Boundary Sign (Type B)

Direction Sign
.png&w=1080&q=75)
Entering a Gaeltacht Area (national road, without name)
.png&w=1080&q=75)
Entering a Gaeltacht Area (regional road, with name)

Exit Sign

Exit Taper Gantry Sign

Lane Destination Sign
.png&w=1080&q=75)
Map Type Advance Direction Sign (roundabout)

Map Type Advance Direction Sign-2

Map Type Advance Direction Sign

Next Exit Sign
.png&w=1080&q=75)
Overhead Gantry Sign (lane drop)
.png&w=1080&q=75)
Overhead Gantry Sign (non-lane drop)

Ritual Kit

River Name Sign with Symbol

Route Confirmatory Sign

Stack Type Advance Direction Sign
.png&w=1080&q=75)
Town and Village Sign (national road)
.png&w=1080&q=75)
Town and Village Sign (regional_local road)
Want to practice these signs on Cork test routes?
These signs commonly appear around Cork examiner routes.
Miscellaneous Signs
5 signs
Tram Information Sign

Junction Definition Post

Turn Back

Authorised Vehicles Only

Location Reference Indicator Sign
Want to practice these signs on Galway test routes?
These signs commonly appear around Galway examiner routes.
Cycle Route Signs
1 signs
C 100 Two-Stage Right Turn
Want to practice these signs on Athlone test routes?
These signs commonly appear around Athlone examiner routes.
Signs indicating particular road layouts
22 signs.png&w=1080&q=75)
Additional Lane Joining From Left (One to Two Lanes)
.png&w=1080&q=75)
Additional Lanes Joining From Right (Two to Three Lanes)
.png&w=1080&q=75)
Additional Lanes Joining From Left - Left Joining Lane Continues (Three to Four Lanes)
.png&w=1080&q=75)
Additional Lanes Joining From Right - Left Joining Lane Continues (Two to Three Lanes)
.png&w=1080&q=75)
Additional Lanes Joining From Left - Left Joining Lane Continues (Three to Four Lanes)
.png&w=1080&q=75)
Additional Lanes Joining From Right - Right Joining Lane Continues (Two to Three Lanes)
.png&w=1080&q=75)
Additional Lanes Joining From Left - Right Joining Lane Continues (Three to Four Lanes)
.png&w=1080&q=75)
Lane Gain (Three to Four Lanes, 200 m)
.png&w=1080&q=75)
Lane Diverge (Four Lanes)

Start of Motorway
.png&w=1080&q=75)
Motorway Prohibitions (English)
.png&w=1080&q=75)
Motorway Prohibitions (Irish)
Start of Motorway Ahead

End of Motorway
End of Motorway Ahead
.png&w=1080&q=75)
Countdown Marker (motorway, 100 m)
.png&w=1080&q=75)
Countdown Marker (motorway, 200 m)
.png&w=1080&q=75)
Countdown Marker (motorway, 300 m)

Cul-de-sac
Start of Nearside With-Flow Bus Lane
Start of Offside With-Flow Bus Lane
.png&w=1080&q=75)
Continuous Bus Lane (Two Lanes)
Want to practice these signs on Limerick test routes?
These signs commonly appear around Limerick examiner routes.
Signs indicating facilities ahead of interest to road users
19 signs
Bus Parking

Cycle Parking
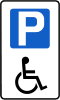
Disabled Persons' Parking
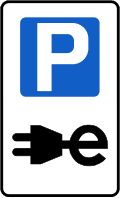
e-Charging

Airport Repeater Sign

Airport Advance Direction
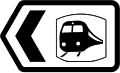
Station Direction
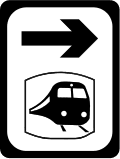
Station Advance Direction

Garda Station
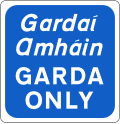
Garda Only

Hospital Advance Direction

Hospital Direction Sign
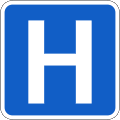
Hospital
Park and Ride Advance Direction

Park and Ride Direction

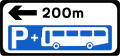
Parking Advance Direction

Parking Direction
Parkng

Sign F 221L Airport Direction
Want to practice these signs on Navan test routes?
These signs commonly appear around Navan examiner routes.
Signs indicating alternative or diversionary routes
4 signs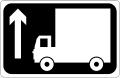
High Vehicle Advance
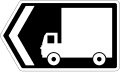
Heavy Vehicle Advance Direction F 501R Heavy Vehicle Direction F 501R Heavy Vehicle
Heavy Vehicle Direction
High Vehicle Direction
Want to practice these signs on Waterford test routes?
These signs commonly appear around Waterford examiner routes.
Signs indicating traffic calming measures
6 signs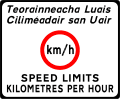
Metric Speed Limit Information
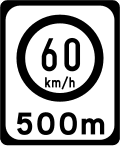
60 km_h Speed Limit Ahead
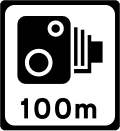
Speed Camera Ahead
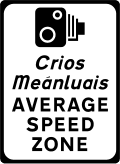
Average Speed Zone
.png&w=1080&q=75)
Variable Speed Limit Zone (motorway)

Slow Zone
Want to practice these signs on Kilkenny test routes?
These signs commonly appear around Kilkenny examiner routes.
Tunnel Information Signs
8 signs
Tunnel Information Sign

Turn Headlights On

Tunnel Radio Stations
%2520Lay-by.png&w=1080&q=75)
Emergency (Tunnel) Lay-by

Fire Extinguisher and Telephone

Fire Extinguisher, Telephone and Lay-by

Emergency Station

Pedestrian Exit
See These Road Signs on Your Real Driving Test Route
Now practice on actual driving test routes where these signs appear, so you build confidence and avoid surprises on test day.
Based on real RSA examiner routes